In-browser, in-WordPress photo editing with Picnik
First published on November 17, 2007
Picnik is a free in-browser, Flash-based photo editor. It contains the handy crop, resize, and rotate functions, as well as a wealth of filters, effects, and text and frame functions. What impressed me was how fast it loads and how lightweight it seems to be.
With its API, there is a great opportunity to write extensions to make it work with other applications, such as, say… your blog! Sometimes I have photos to upload to a post but it takes a while to load up a bloated desktop photo editor. For WordPress, plugins such as the WP Vivtiger Image Resizer enable you to work with images within your admin panel and are quite useful. Picnik could also integrate into your blog quite seamlessly. I hacked together a quick and dirty plugin that integrates Picnik and WordPress.
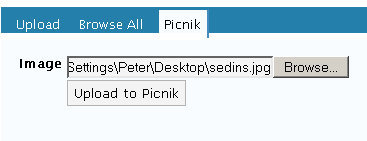
First, when you’re creating or editing a post, click the Picnik tab in the usual upload section:
Once you’ve uploaded an image from your computer, you’ll be presented with the Picnik interface, fitting snugly into your WordPress window.
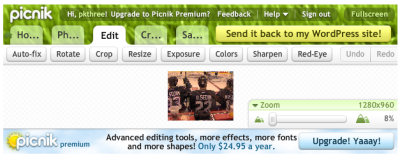
You probably can’t do much in this small window, so click the Fullscreen button in the top right of the Picnik interface. Once you are in fullscreen mode, note that there’s a nice bold Send it back to my WordPress site button for when you are done editing.

For this example, I cropped a photo, adding some text, applied the sepia filter, and added a frame. Now, I’m no photo editing expert, but these Picnik functions were accessible and quite easy to use…

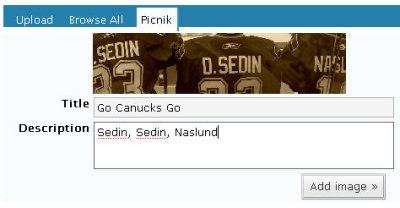
Once you’ve sent the image back to WordPress, you can fill in the usual Title and Description fields for the image.
Then, use the usual WordPress interface to add the image to your post.
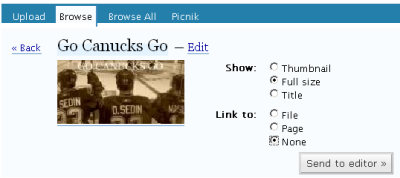
And finally, here’s the edited image, embedded into a blog post!

You can download the WordPress-Picnik plugin here (it’s unofficial… ’twas me who made it after all). Note that you will need to get a free Picnik API key and enter it into the $picnik_api setting near the top of the plugin file (it’s the only setting). Then, just upload it to your WordPress plugins folder and activate it!
There are some massive limitations to my plugin in that it won’t edit images that you’ve already uploaded to your blog, and the coding is probably a bit shaky because I hacked together parts of the WordPress files upload code. I have no intention of providing support for the plugin or on developing it further. However, it works for me as demonstrated above and can serve as a good starting basis for further development (please steal any of the code and improve it — I’ll be happy to publicize your version!).
 Facebook
 Twitter
 Email this
 keung.biz. Hire my web consulting services at


May 11th, 2008 at 10:57 am
Ken says:
this is a great tutorial. thanks!
July 21st, 2008 at 8:48 am
Ramzan says:
Wow, i don’t know that such a plugins ( i would say it software) exist. Previously i use paint.net to create watermark for my windows.
And now i will use this software
January 19th, 2009 at 6:46 am
Ovidiu says:
how does your plugin compare to this one http://wordpress.org/extend/plugins/pixenate-photo-editing-for-wordpress/ and how does Picnik compare to Pixenate?
January 19th, 2009 at 8:22 am
Peter says:
Hi Ovidiu, I’m not sure how it compares because I’ve never tried that plugin of Pixenate. However, a Picnik account is free, so you can certainly sign up to try it out. Note that the plugin that I wrote here was originally written in November 2007 and was intended as a framework for anybody to make a more fully featured solution.
January 19th, 2009 at 10:06 pm
Ovidiu says:
cool thx. I will give both a try later on this week I hope
January 22nd, 2011 at 7:45 am
Ksenia says:
I’m creating my own blog on picnik.com! check it out http://picnikstuff.wordpress.com/