Show crop marks when exporting a business card PDF with bleed in InDesign
First published on July 15, 2007
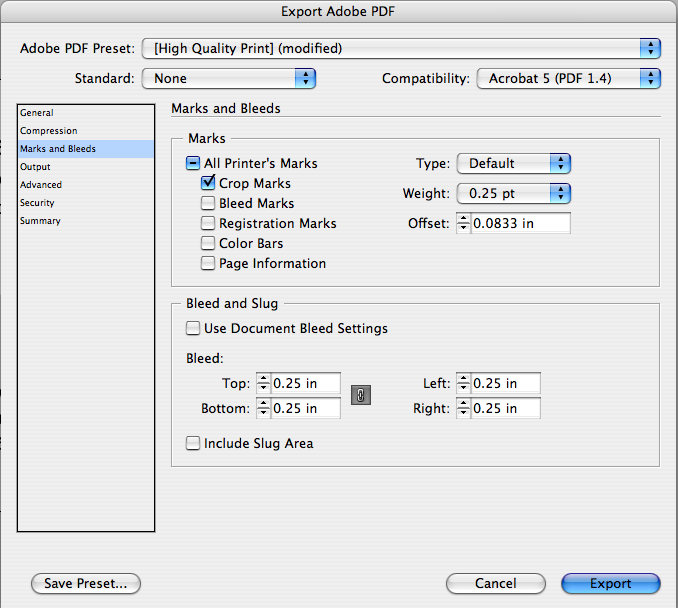
Whenever it’s time to print new business cards at work, I forget which settings to use for exporting the PDF in InDesign to send to the printing shop. Trial and error is a waste when you know you’ve done something before.
We have 3.5″ x 2″ business cards with some bleed (“bleed” means that the ink goes directly to the edge of the paper, so the printer must print a slightly larger page and then cut it). Here is a screenshot of the settings so that I don’t forget next time:
To add some more value to this post, here’s a short list of (two) things I’ve learned the hard way about printing business cards:
- Always get a print proof from the printing shop. An electronic proof is rather useless, because you can check that yourself on your computer.
- Either provide the printing shop with the fonts used or create outlines of all text boxes in InDesign before exporting to PDF (select the text and choose “Type… Create Outlines” or press CTRL + Shift + O (or Apple + Shift + O) on your keyboard). The “embed fonts” option does not always work well.
 Facebook
 Twitter
 Email this
 keung.biz. Hire my web consulting services at


December 9th, 2008 at 7:49 am
cinnamon k says:
thank you
can’t get enough useful crap
October 25th, 2012 at 7:03 am
Claudia says:
Cheers !