Posts on this site are never sponsored.
I’ve previously written about using XE Trade for currency exchange: exchanging Canadian dollars for US dollars and sending money internationally. In both cases (including sending money to the UK and Australia), there are no fees charged by XE Trade except for the exchange rate spread (since, as with all currency exchanges, they charge more than the mid-rates).
My company recently had to send money from Canada to Brazil. We first used PayPal, but for the amount involved, the fees were quite high. So we looked at XE Trade. Unfortunately, there are no fee-free options when sending money to Brazil, and it was a bit more complicated than sending money to the UK or Australia.
The first thing to be aware of when sending money to Brazil is that the standard international currency is US dollars, so all foreign currencies that arrive are first converted to US dollars. Therefore, we had a couple of options:
- Send a US dollar wire transfer directly to XE Trade
- Use XE Trade to convert Canadian dollars to send a US dollar wire transfer
There were a couple of problems with the first option: the XE Trade fee was $64.91 instead of $22, and we had to send a wire transfer to XE’s bank (Custom House) in the US — that would have added an additional fee. My company’s bank (RBC Royal Bank, using their RBC International Remittance option) does not currently support any online wire transfers for business accounts, and oddly does not support wire transfers to the US even from personal accounts.
With the second option, the wire transfer fee charged by XE Trade was $22, and we could pay using our bank’s online bill payment system since we were paying in Canadian dollars. For the amount that we were sending, the additional transaction costs of converting CAD to USD (instead of directly from any existing US dollars we had) plus the wire transfer fee still added to less than the fees from the first option.
In the end, it worked out well using XE Trade to send money to Brazil and it took only 2 business days for the money to arrive!
2015 update: I now use CanadianForex and have found their rates to be better than XE Trade.
Posted in Canadian Banking | 1 Comment »
My 3-seat couch recently fell apart and I needed to responsibly dispose of it. In my apartment building, it is frowned upon to leave junk in the garbage room even if you are willing to pay for it.
First, I tried listing the couch on Craigslist for free, but nobody called. Then I looked into 1-800-GOT-JUNK; they don’t advertise their fees, so I had to call in. I was quoted a rate of $182 in Burnaby, which I was told includes labour, gas, disposal fees, and insurance for 2 workers. (Presumably they know their fee is comparatively very high, so they have to explain that you are getting all these things you didn’t think about.) Eventually, I called my favourite handyman and paid about half the amount, although we didn’t fully itemize the cost as he also helped me with something else in my place.
1-800-GOT-JUNK is probably worth it for other types of disposal jobs, but in this case their price was much too high. In the future, for disposing large household items, I would suggest considering some other alternatives that I hadn’t originally explored:
- If you or someone you know has a truck, you can drive your item(s) to the landfill yourself. In Metro Vancouver, the dump fee is only a minimum of $10-$20.
- If your city doesn’t have a spring cleanup program (where everybody can put large items outside their house for disposal once a year), consider calling your city to see if they’ll do a one-time pick-up. This option exists in Burnaby and New Westminster, although there doesn’t appear to be a public price list.
Posted in Environment, Vancouver / BC / Canada | 1 Comment »
I needed to set up a connection whereby multiple users in different locations could simultaneously connect to a VPN with a single static IP. We needed to access a third-party network through a single IP. I looked into many paid and free external VPN services, but they almost all had restrictions on multiple simultaneous connections (from different locations); or they didn’t provide a static IP; or they only provided a simple proxy service (which meant we’d have to configure port forwarding for each HTTP / SSH / other connection). I decided to set up our own VPN on one of our web servers using the free OpenVPN application. It was quite straightforward to set up both the VPN server and the clients. The only requirement is that you must already have a server where you have root access.
I followed this tutorial for installing the VPN server on CentOS. There is also a similar tutorial for installing the VPN server on Ubuntu. I have only a few corrections / modifications based on the CentOS tutorial:
- The “easy-rsa” key management package no longer comes with OpenVPN. You have to install it separately; for example: yum install easy-rsa. Then you’ll find the “easy-rsa” files in /usr/share/easy-rsa.
- There is a useful comment below the tutorial about how to set up TLS authentication for better security.
- If you want to use the same key for multiple clients, use the “duplicate-cn” setting in the server.conf file
- When you create your client.ovpn configuration file, you might want to reference the certificate files instead of pasting them directly into the configuration.
On the client side, there is an OpenVPN GUI client that works well. If you are using Ubuntu on the client side, you can use the built-in Network Manager; just add OpenVPN support — apt-get install network-manager-openvpn — and then import the .ovpn configuration file as outlined here.
Once you’ve set up the server and the clients, when you connect to the VPN, all of your network requests will run through the server.
Posted in Computer Stuff | No Comments »
I was going to be travelling to Vancouver Island for 1 month and needed a backup Internet service for work in case the power went out or the Internet connection was spotty. Since I don’t have a smart phone data plan to tether to, I was looking for a mobile Internet USB stick. Bell ended up loaning me a hotspot / hub device for free. I just had to pay for the data plan, and the speed and reliability was great.
Since I only needed to use the device for 1 month, I was hoping to find a pay as you go plan. I first looked into Virgin Mobile, but apparently they don’t sell Internet sticks or hubs anymore. Wind Mobile was an option, but “Wind AWAY” zones (basically, outside of major Canadian cities) are charged roaming data rates of $1 per MB.
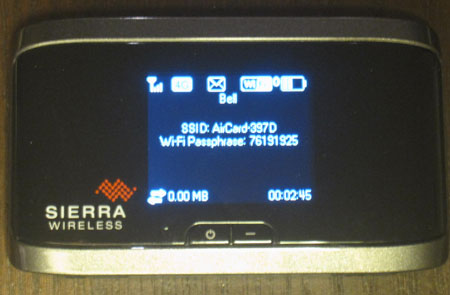
I was resigned to paying a large amount with one of the bigger wireless companies — Telus, Rogers, or Bell. Bell was actually at the bottom of my list, but they were the first store in the mall I went to. I explained my situation to them and we looked at the devices that I could buy. Unexpectedly, the customer service representative suggested that they would rent me the store’s mobile hub unit, a “4G LTE Sierra Wireless 763 Turbo Hotspot”, at no cost. I just had to pay a deposit, sign up for a monthly data plan, and then immediately call to cancel so that I would have only 1 month of service. I was grateful for the offer and went with it.
The hub fits in your hand and works by taking the cellular signal and providing a normal wireless network (just like a standard router) that you can connect to with your computer or other device. It has a battery that lasts at least a few hours and can be charged via its AC adapter or via a computer’s USB port.
The Bell mobile data “flex” plan starts at $10/month for up to 100MB. Then the cost automatically increases if you go over 100MB: it’s $30 for up to 500MB, $45 for up to 2GB, $70 for up to 6GB, and so on.
I ended up having reliable wired Internet on my trip, and there were no power outages. However, I did use the hub to make Skype calls in Crofton, BC (in a spot where Rogers and Wind phones had no signal), and I also used it on the entire ferry ride between Vancouver Island between Duke Point (Nanaimo) and Tsawwassen. Connection speed was up and down, but reliability was great — I never lost the connection. I ran a few speed tests at speedtest.net at different times and locations and got the following results:
- HSPA network 0.46Mbps down, 0.54Mbps up
- HSPA network: 5.6Mbps down, 1.81Mbps up
- 4G network: 15.2Mbps down, 7.2Mbps up
Posted in Telephony | 2 Comments »
After trying out XE Trade last year to convert Canadian dollars into US dollars for my own personal use, I decided to try it for business use. My company has a sub-contractor in the UK, and our alternatives were to send a wire transfer or a cheque. A wire transfer typically charges both the sender and the receiver fees, while a cheque takes time to send, deposit, and clear.
XE Trade was easy to use, fee-free, and fast. By “fee-free” I mean that they did not charge an extra fee on top of their regular currency exchange spread — and I’ve found their spread to be quite competitive. I just had to choose “ACH/EFT” as the sending method. I now intend to use XE Trade on a regular basis for my company.
The setup process required me to send XE Trade quite a few company documents electronically. Once set up, however, I just had to enter the recipient’s bank account information and then pay a bill as if it were any regular bill (such as a credit card bill). For more information on that general process, see my previous review.
Here is the timeline in business days for how long it took for me to set up a business account with XE Trade and send a payment in Canadian dollars from a Canadian bank to be deposited in British pounds in a UK bank.
Day 1: Registered for an XE Trade account
Day 1: Received an e-mail (in my spam folder) asking that I send over scanned documents (driver’s licence, certificate of incorporation, articles of association, names of shareholders owning 25% of more of the business) to verify my identity
Day 2: Received a reminder e-mail asking that I send over scanned documents to verify my identity
Day 3: I sent over scanned documents
Day 4: Received notification that the account was activated
Day 5: I initiated a trade (CAD in Canada to GBP in the UK) with a locked in rate based on that day, chose “ACH/EFT” as the sending method, and paid the bill through my bank’s online interface
Day 8: Received a notification e-mail that the money was sent to the recipient
Day 11: Money was deposited into the destination account; no fees were deducted on either end
The time between sending and receiving money took 6 business days.
2015 update: I now use CanadianForex and have found their rates to be better than XE Trade.
Posted in Canadian Banking, Canadian Small Business | 2 Comments »
 keung.biz. Hire my web consulting services at

